You can use it in a pond, a pool, or even in a bathtub.
Follow these step-by-step instructions to create your own paddle boat!
Let's get started!
How to Prepare:
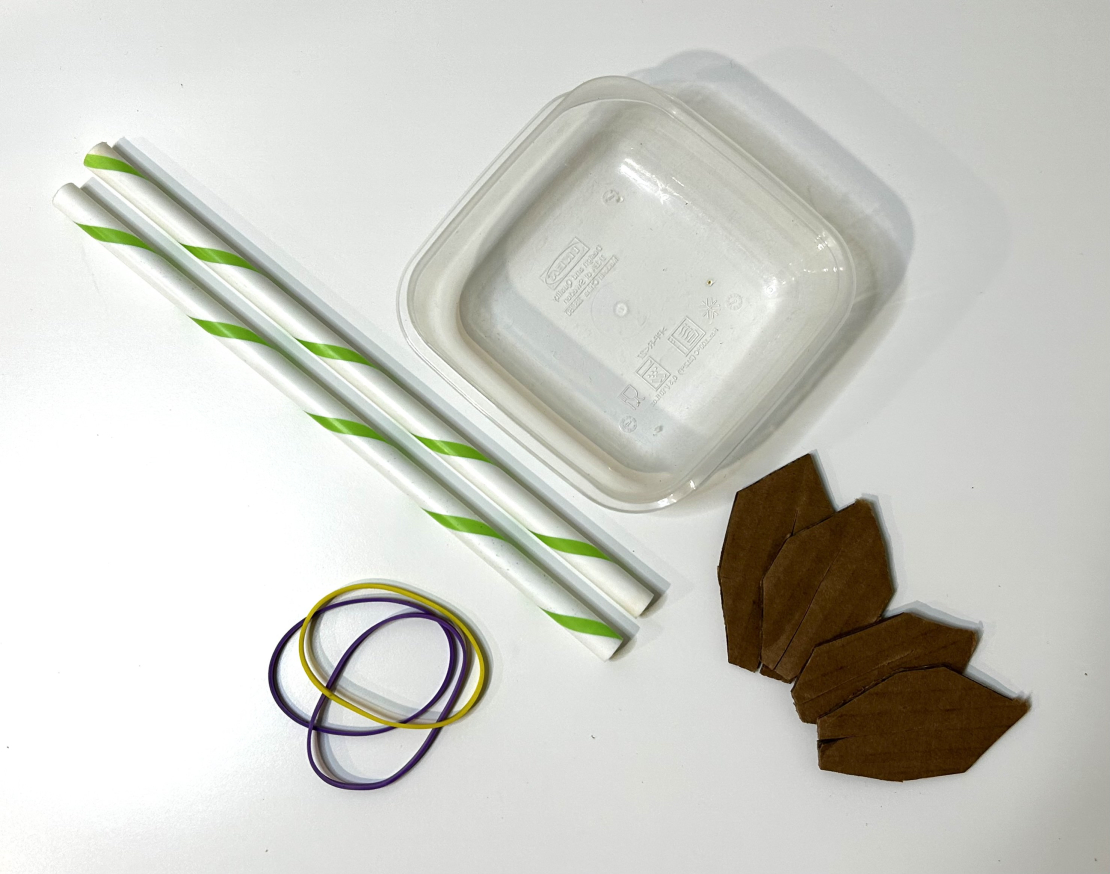
Collect the following items before you begin:
- Shallow plastic container (like a piece of tupperware for a sandwich)
- 3 large rubber bands
- 2 pencils / popsicle sticks (pencils should be longer than container; by at least 5 cm)
- Cardboard, a thick piece of paper, or foam shapes
Build your Paddle Boat!
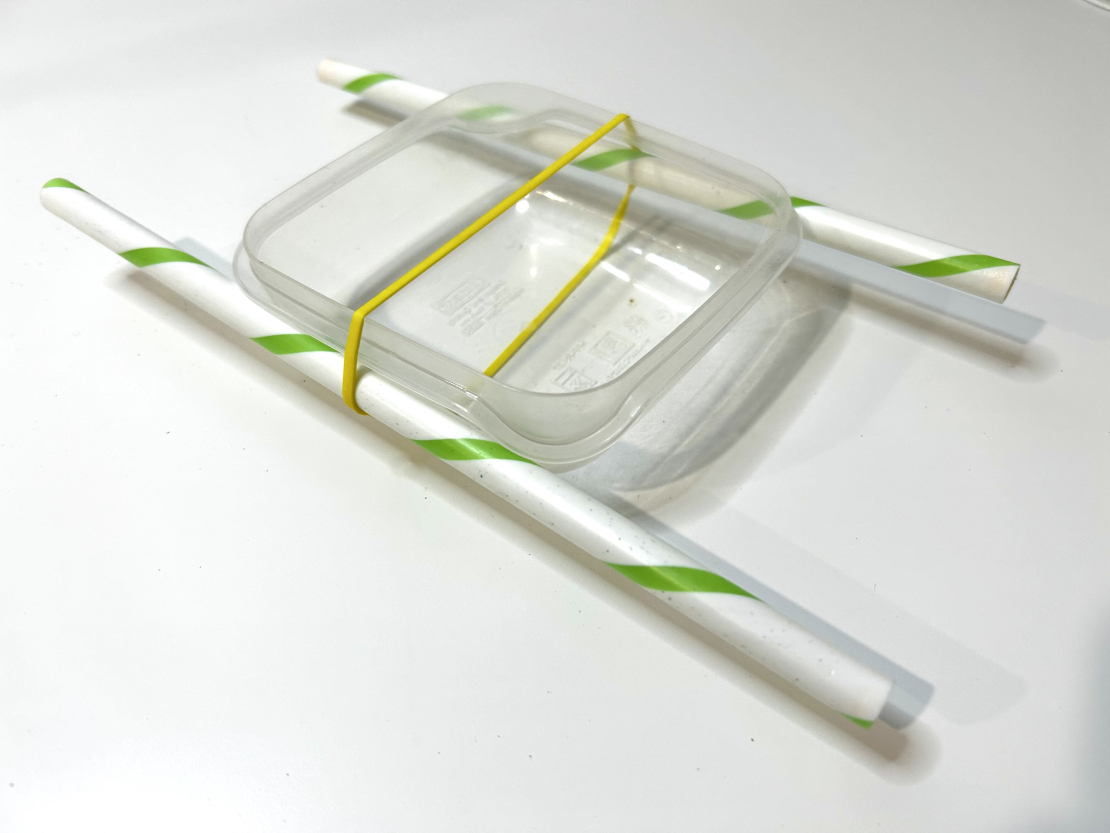
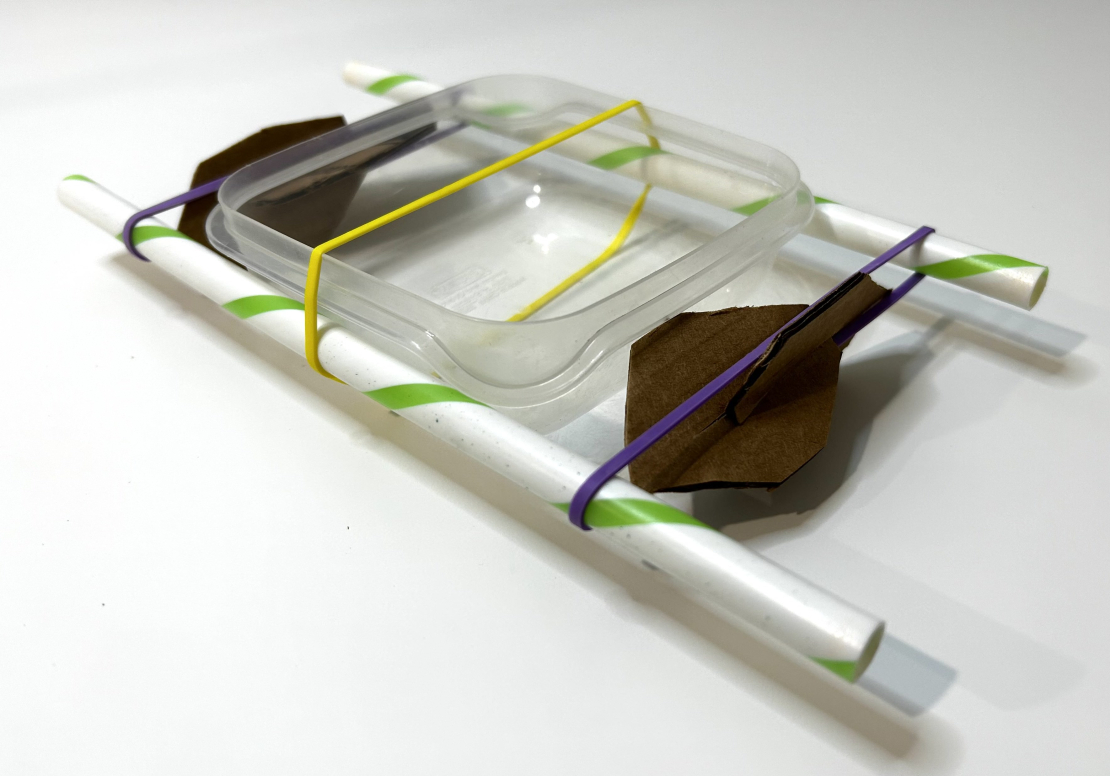
Step 1: Using a large rubber band, wrap the two pencils onto the plastic container, one on each side. The pencils should be held tightly to the side of the container.
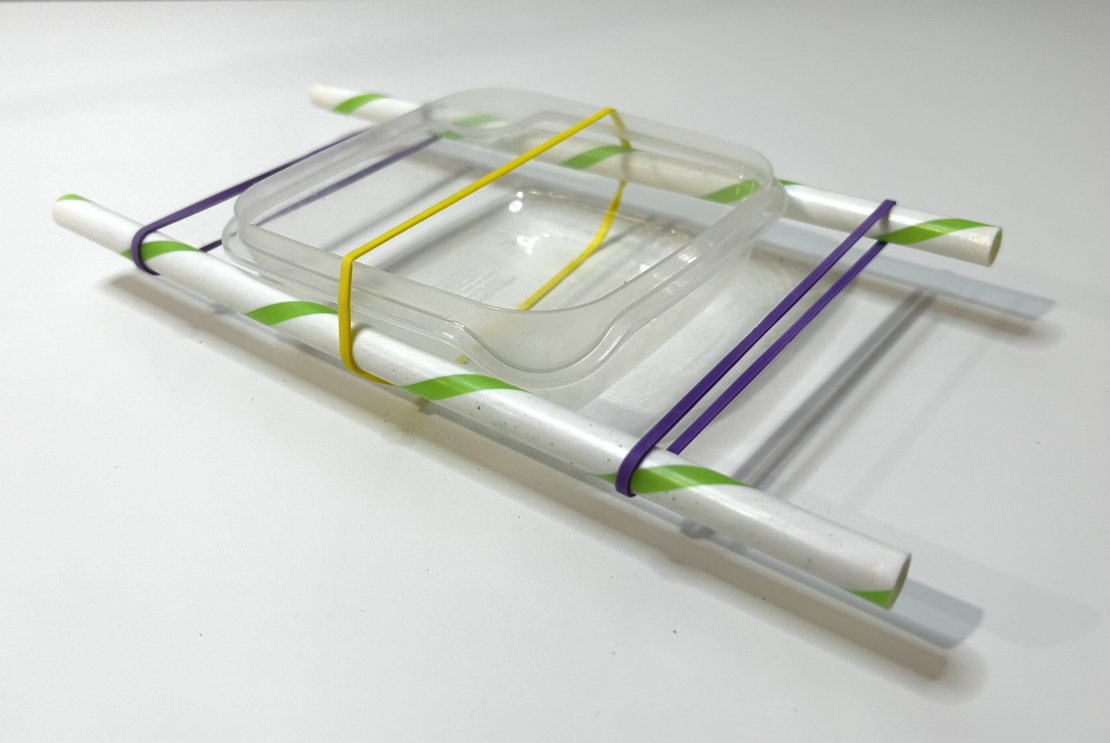
Step 2: Put one more rubber band binding the two pencils behind the boat, and another one in front of the boat for balance.
Step 3: Cut your cardboard into four small hexagonal pieces that are small enough to fit in the space between the two pencils at the back of the boat.
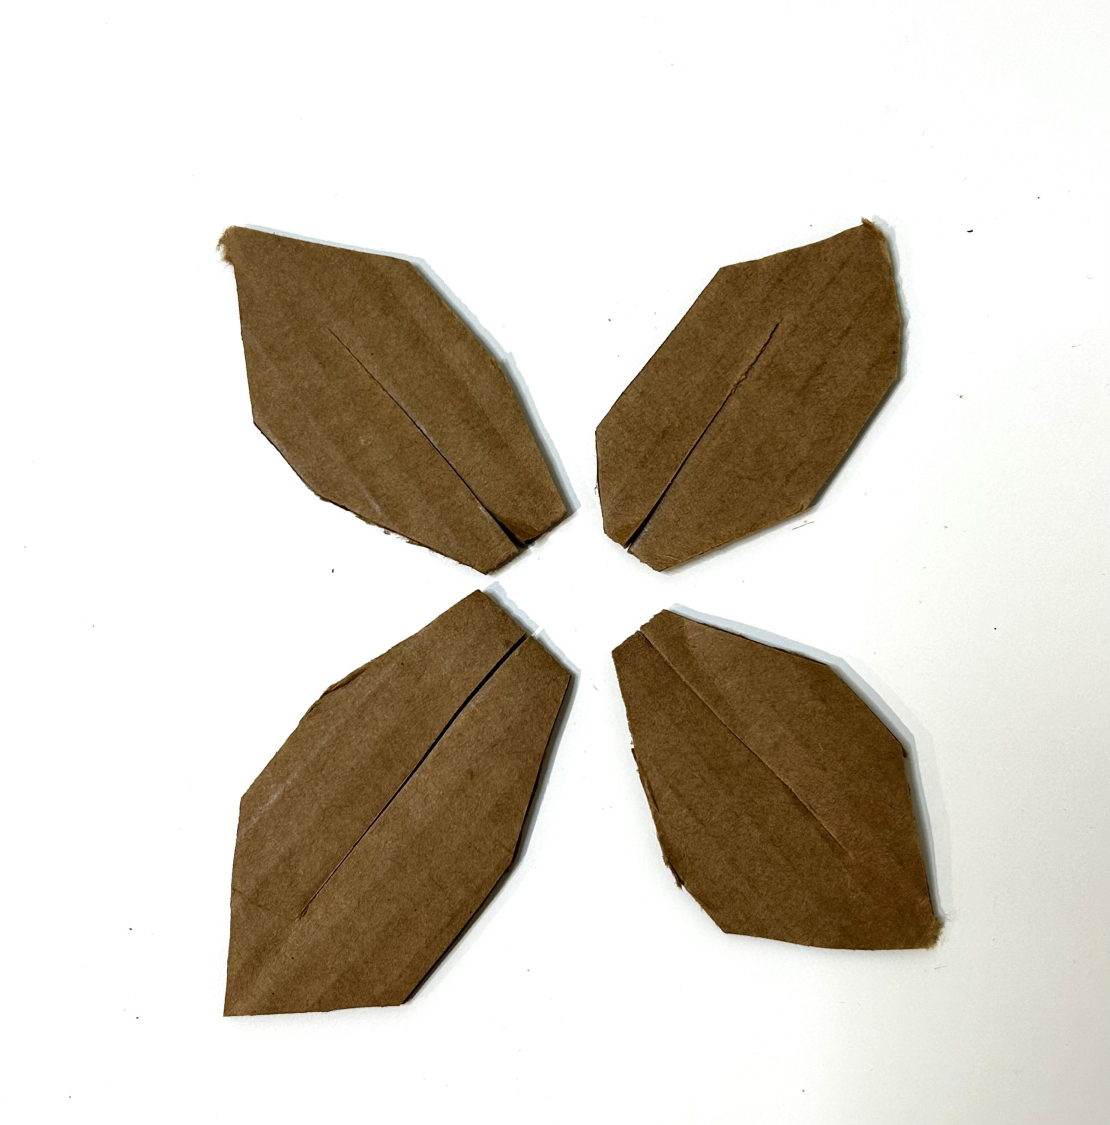
Step 4: On each piece of cardboard, make a cut in the middle but stop halfway! Do not cut it all the way through.
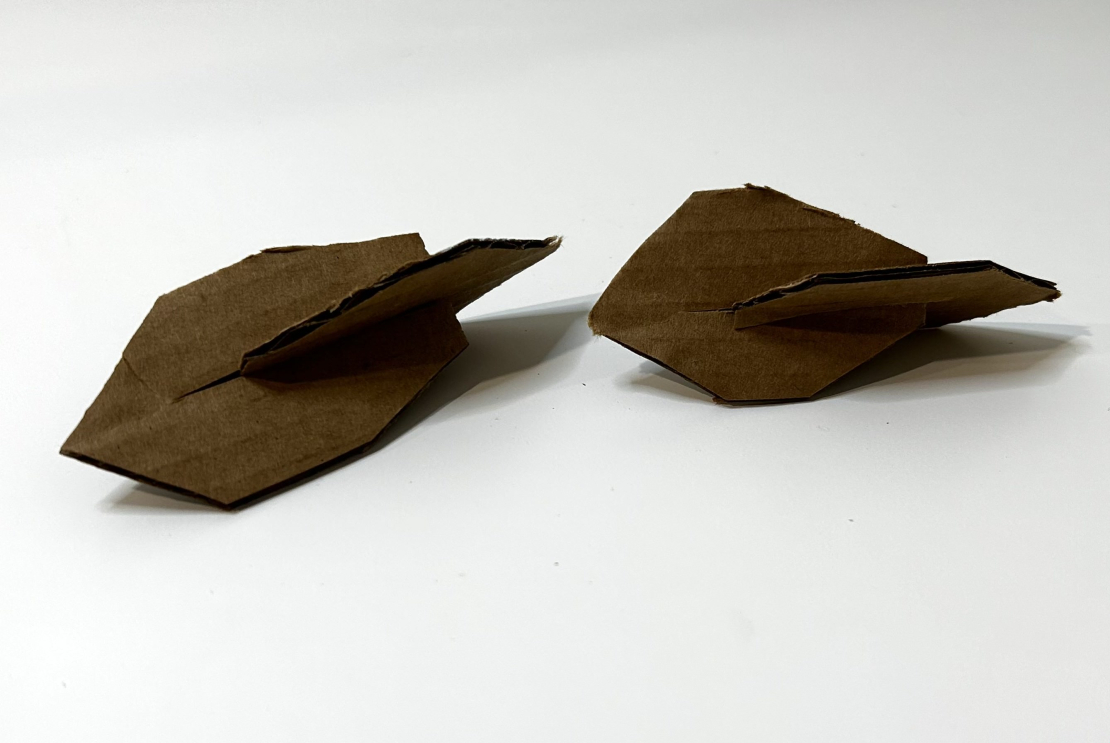
Step 5: Put the two pieces of cardboard together by sliding one slit onto the other to make a rotating paddle. Do the same to the other two. It will look like a small “x” or a paddle wheel.
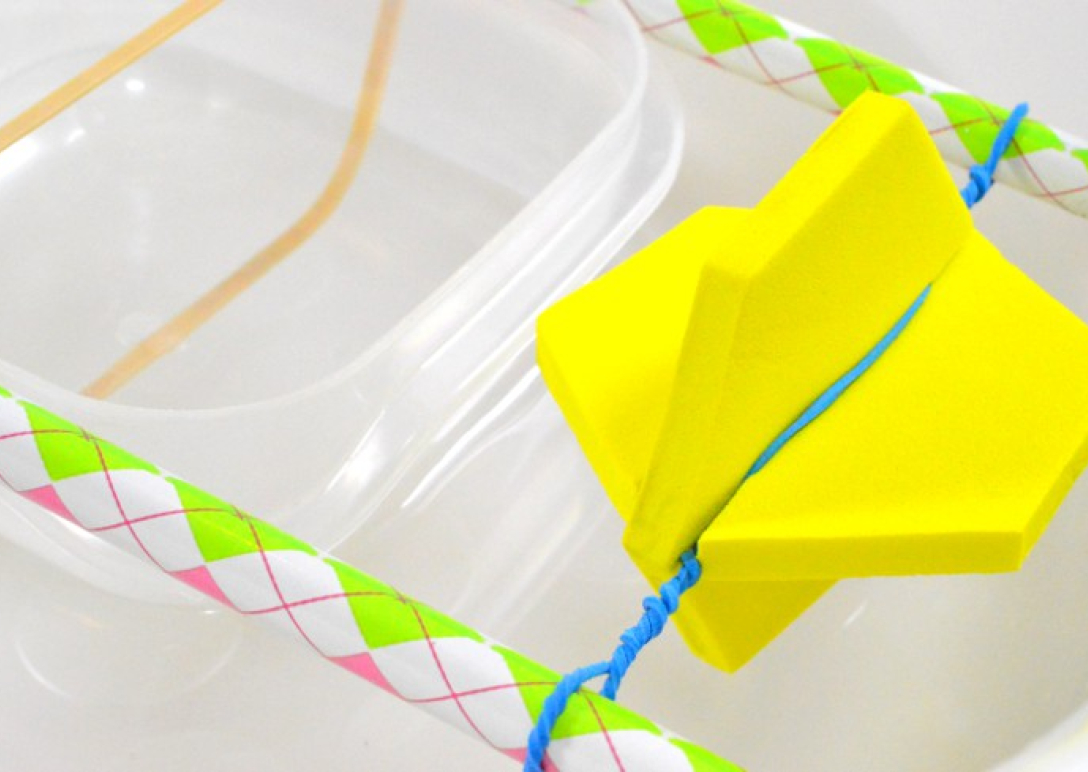
Step 6: Fit the paddles onto the rubber bands. Use one of the slits to attach them to the rubber bands, one paddle at the front and one paddle at the back. Now you have paddles!
Step 7: To make them rotate, twist the paddles on the rubber bands to wind them up!
💡Activity Hack! Although there are two paddle wheels, you can use only one of them. The second wheel is there to balance the boat so it doesn't tilt.
Step 8: Time to put your boat on water! Without releasing the twists, place your boat on water and then let go.
Step 9: Observe which direction your boat goes!
Paddle Boat Complete! Congratulations!
Keep twisting the paddles on the rubber bands to wind them up and observe the directions your boat goes. Happy sailing!
How It Works
When you wind up the paddle, the rubber band stores energy. This is called potential energy, which occurs because the twisted rubber band is not in equilibrium (equal)—you have to hold it in place or it will unwind. When you let go of the paddle, the rubber bands unwind to rotate the paddle and push the boat forward.
This activity is inspired by:
https://www.rookieparenting.com/build-a-paddle-boat-stem-for-kids/